Vue 프로젝트 시작하기 w. Vite

Vite.js 빌드 도구를 사용해 Vue 프로젝트를 시작하는 방법을 설명합니다.
자바스크립트와 타입스크립트 프로젝트에서의 구성을 구분하고 있습니다.
# 기본 프로젝트 생성
VS Code로 프로젝트 폴더를 열고 터미널에서 다음 명령을 순서대로 실행합니다.
123456# 현재 경로에 프로젝트 구성 npm create vite@latest . Select a framework: Vue Select a variant: TypeScript 혹은 JavaScript Install with npm and start now? Yes
혹은. 터미널에서 프로젝트를 생성할 경로로 이동 후 다음 명령을 순서대로 실행합니다.
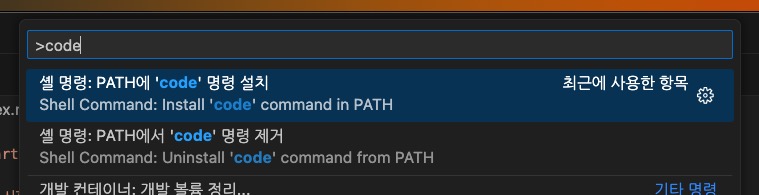
123456789101112131415161718192021# 현재 경로에 프로젝트 폴더 생성 및 구성 npm create vite@latest <프로젝트_폴더_이름> Select a framework: Vue Select a variant: TypeScript 혹은 JavaScript Install with npm and start now? No # 프로젝트 경로로 이동 cd <프로젝트_폴더_이름> # 의존성 패키지 설치 npm i # 현재 경로를 새로운 VS Code 창으로 열기 code . # 혹은 현재 VS Code 창에서 열기 code . -r # 혹은 수동으로 프로젝트 열기 # 개발 서버 실행 npm run dev
# ESLint + Prettier 구성
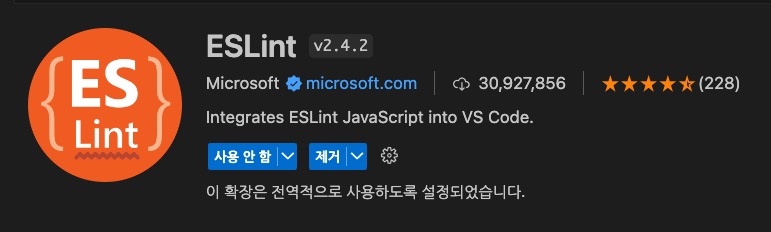
- ESLint: 코드 품질 확인 및 버그, 안티패턴(Anti-pattern)을 감지
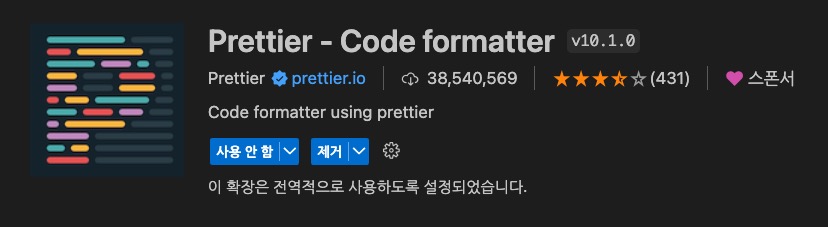
- Prettier - Code formatter: 코드 스타일 및 포맷팅 관리, 일관된 코드 스타일을 적용 가능
# VS Code 확장 프로그램 설치
ESLint와 Prettier를 사용하기 위해 VS Code에서 각 확장 프로그램을 설치합니다.
설치 후에는 VS Code를 재시작하는 것이 좋습니다.
Vue 프로젝트이므로, 다음 확장 프로그램도 추가로 설치해 도움을 받을 수 있습니다.
- Vue - Official: Vue 프로젝트의 문법 강조, 자동 완성, 오류 검사 등을 지원

# 패키지 설치 및 구성
프로젝트에서 사용할 수 있도록, 각 의존성 패키지를 설치합니다.
각 패키지는 모두 런타임에서 필요치 않은 개발용이기 때문에, -D 플래그를 사용해 '개발 의존성 패키지(Dev Dependencies)'로 설치합니다.
1npm i -D eslint @eslint/js globals eslint-plugin-vue prettier eslint-config-prettier eslint-plugin-prettier
1npm i -D eslint @eslint/js eslint-plugin-vue @vue/eslint-config-typescript prettier eslint-config-prettier eslint-plugin-prettier
| 패키지 | 설명 |
|---|---|
eslint |
ESLint 코어 패키지 / 코드 품질 확인 및 버그, 안티패턴(Anti-pattern)을 감지 |
@eslint/js |
ESLint의 기본 추천 규칙 모음 |
globals |
브라우저 등 실행 환경의 전역 변수 목록 |
eslint-plugin-vue |
Vue 지원 플러그인, 문법 분석 및 검사 지원 |
@vue/eslint-config-typescript |
타입스크립트 규칙과 함께, *.vue 파일 내부를 분석할 파서를 연결 |
prettier |
Prettier 코어 패키지 / 코드 스타일 및 포맷팅 관리, 일관된 코드 스타일을 적용 가능 |
eslint-config-prettier |
Prettier와 충돌하는 ESLint 규칙을 비활성화, 대부분 eslint-plugin-vue가 켜는 포맷 규칙 |
eslint-plugin-prettier |
Prettier 규칙을 ESLint 규칙으로 통합 |
설치가 완료되면, 프로젝트 루트 경로에 eslint.config.js 파일을 생성하고 다음과 같이 내용을 추가합니다.
1234567891011121314import js from '@eslint/js' import globals from 'globals' import pluginVue from 'eslint-plugin-vue' import prettierRecommended from 'eslint-plugin-prettier/recommended' import { defineConfig, globalIgnores } from 'eslint/config' export default defineConfig([ { files: ['**/*.{vue,js,mjs,jsx}'] }, globalIgnores(['**/dist/**']), { languageOptions: { globals: globals.browser } }, js.configs.recommended, pluginVue.configs['flat/recommended'], prettierRecommended ])
1234567891011121314import js from '@eslint/js' import pluginVue from 'eslint-plugin-vue' import { defineConfigWithVueTs, vueTsConfigs } from '@vue/eslint-config-typescript' import prettierRecommended from 'eslint-plugin-prettier/recommended' import { globalIgnores } from 'eslint/config' export default defineConfigWithVueTs( { files: ['**/*.{vue,ts,mts,tsx}'] }, globalIgnores(['**/dist/**']), js.configs.recommended, pluginVue.configs['flat/recommended'], vueTsConfigs.recommended, prettierRecommended )
필요한 경우, *.vue 파일의 <template>이나 <script> 등에서 사용할 커스텀 규칙을 덮어쓸 수 있습니다.
구성의 가장 마지막에 다음 객체를 추가하면 됩니다.
자세한 규칙은 ESLint plugin for Vue.js / Rules 에서 확인할 수 있습니다.
123456789101112131415161718192021222324// ... export default defineConfigWithVueTs( // ... { rules: { 'vue/html-closing-bracket-newline': ['error', { singleline: 'never', multiline: 'never' }], 'vue/html-self-closing': ['error', { html: { void: 'always', normal: 'never', component: 'always' }, svg: 'always', math: 'always' }], 'vue/comment-directive': 'off', 'vue/no-v-html': 'off' } } )
추가로, 프로젝트 루트 경로에 .prettierrc 파일을 생성하고 다음과 같이 내용을 추가합니다.
자세한 규칙은 Prettier / Options 에서 확인할 수 있습니다.
12345678910{ "semi": false, "singleQuote": true, "singleAttributePerLine": true, "bracketSameLine": true, "endOfLine": "auto", "trailingComma": "none", "arrowParens": "avoid", "printWidth": 100 }
# 자동 포맷팅 설정
현재 프로젝트에서만 사용하는 사용자 설정(지역)을 통해 자동 포맷팅을 사용할 수 있습니다.
프로젝트의 루트 경로에 .vscode/settings.json 폴더와 파일을 생성해 다음과 같이 내용을 추가할 수 있습니다.
1234{ "editor.formatOnSave": true, "editor.defaultFormatter": "esbenp.prettier-vscode" }
*.vue, *.js, *.ts뿐만 아니라 *.json, *.css, *.html, *.md 등 Prettier가 지원하는 모든 파일이 대상이 됩니다.
특정 언어만 다르게 동작하도록 하려면, "[vue]": { ... }처럼 언어별 설정으로 덮어쓸 수 있습니다.
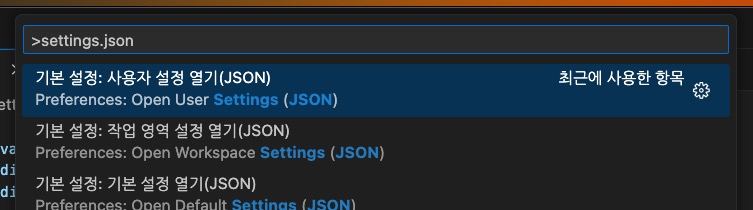
사용자 설정(전역)은, 명령 팔레트에서 settings.json로 검색해 열 수 있습니다.
# 경로 별칭 구성
경로 별칭(Path Alias)을 사용하면, 프로젝트 내의 파일을 쉽게 참조할 수 있어 편리합니다.
12345678910111213import { defineConfig } from 'vite' import vue from '@vitejs/plugin-vue' // https://vite.dev/config/ export default defineConfig({ plugins: [vue()], resolve: { alias: [ { find: '@', replacement: '/src' }, { find: 'node_modules', replacement: '/node_modules' } ] } })
123456789<script setup lang="ts"> // import { useMovieStore } from '../../../../store/movie' import { useMovieStore } from '@/store/movie' </script> <style> @import 'node_modules/swiper/swiper.css'; @import 'node_modules/swiper/modules/navigation.css'; </style>
타입스크립트에서도 경로 인식이 가능하도록, 다음과 같이 구성 옵션을 추가합니다.
Vite가 생성한 tsconfig.json 파일은 다른 구성 파일을 참조하기만 하므로, tsconfig.app.json 파일에 옵션을 추가합니다.
123456789{ "compilerOptions": { // ... "paths": { "@/*": ["./src/*"], "node_modules/*": ["./node_modules/*"] } } }
TypeScript 5버전 이하를 사용하는 경우, baseUrl 옵션이 필요할 수 있습니다.
12345678910{ "compilerOptions": { // ... "baseUrl": "./", "paths": { "@/*": ["./src/*"], "node_modules/*": ["./node_modules/*"] } } }
# Official Vue Starter
지금까지의 구성을 직접 하지 않고, Vue 공식 스타터로 한 번에 받을 수도 있습니다.
Vite의 Vue 템플릿이 최소 구성만 제공하는 것과 달리, 라우터와 상태 관리, 테스트, 린터, 포매터까지 선택해 함께 구성합니다.
경로 별칭 @와 .editorconfig, .vscode/settings.json도 포함되어 있습니다.
프로젝트를 생성하는 명령은 같고, Select a variant:에서 Official Vue Starter ↗를 선택하면 됩니다.
123456789101112131415# 현재 경로에 프로젝트 폴더 생성 및 구성 npm create vite@latest <프로젝트_폴더_이름> Select a framework: Vue Select a variant: Official Vue Starter ↗ Use TypeScript? Yes 혹은 No Select features to include in your project: JSX Support Router (SPA development) Pinia (state management) Vitest (unit testing) End-to-End Testing Linter (error prevention) Prettier (code formatting)
선택이 끝나면 프로젝트 폴더만 생성되므로, 의존성 설치와 개발 서버 실행은 직접 진행합니다.
123cd <프로젝트_폴더_이름> npm i npm run dev
Linter (error prevention)를 선택하면 eslint.config.ts와 .oxlintrc.json이 함께 생성되고, package.json에 다음 스크립트가 추가됩니다.
12345678{ "scripts": { "lint": "run-s \"lint:*\"", "lint:oxlint": "oxlint . --fix", "lint:eslint": "eslint . --fix --cache", "format": "prettier --write --experimental-cli src/" } }
추가로, .prettierrc 파일 규칙을 다음과 같이 추가합니다.
1234567891011{ "$schema": "https://json.schemastore.org/prettierrc", "semi": false, "singleQuote": true, "singleAttributePerLine": true, "bracketSameLine": true, "endOfLine": "auto", "trailingComma": "none", "arrowParens": "avoid", "printWidth": 100 }
# ESLint와 oxlint
oxlint는 Rust로 만든 린터로, ESLint보다 빠르게 동작합니다.
다만 타입 정보를 사용하는 규칙이나 eslint-plugin-vue의 Vue 전용 규칙까지 대신하지는 못하기 때문에 ESLint를 함께 사용합니다.npm run lint는 oxlint를 먼저 실행하고 ESLint를 이어서 실행합니다.
두 린터는 기본적으로 검사 범위가 겹치는데, 그대로 두면 같은 문제를 두 번 보고하게 됩니다.
이를 해결하는 것이 eslint.config.ts의 buildFromOxlintConfigFile 호출입니다.
1234567891011121314import { globalIgnores } from 'eslint/config' import { defineConfigWithVueTs, vueTsConfigs } from '@vue/eslint-config-typescript' import pluginVue from 'eslint-plugin-vue' import pluginOxlint from 'eslint-plugin-oxlint' import skipFormatting from 'eslint-config-prettier/flat' export default defineConfigWithVueTs( { files: ['**/*.{vue,ts,mts,tsx}'] }, globalIgnores(['**/dist/**', '**/dist-ssr/**', '**/coverage/**']), ...pluginVue.configs['flat/essential'], vueTsConfigs.recommended, ...pluginOxlint.buildFromOxlintConfigFile('.oxlintrc.json'), skipFormatting )
.oxlintrc.json을 읽어, oxlint가 이미 검사하는 ESLint 규칙을 끕니다.
그러면 중복 보고가 사라지고, ESLint가 검사할 양도 줄어듭니다.
# 린터 버전 맞추기
eslint-plugin-oxlint와 oxlint는 같은 버전으로 고정해야 하는데, 템플릿 구성 문제로 버전이 다를 수 있습니다.
그러면 npm i를 통해 패키지를 설치하는 과정에서 다음과 같은 오류가 나타날 수 있습니다.
1234npm error code ERESOLVE npm error Found: oxlint@1.74.0 npm error Could not resolve dependency: npm error peer oxlint@"~1.73.0" from eslint-plugin-oxlint@1.73.0
그러면 두 패키지의 버전을 같도록 수정해야 하고, 버전을 일치시킬 때는 더 낮은 버전으로 수정합니다.
123456{ "devDependencies": { "eslint-plugin-oxlint": "~1.73.0", "oxlint": "~1.73.0" } }
수정 후 다시 npm i를 실행하면 설치가 완료됩니다.
# 파일 중첩
공식 스타터는 .vscode/settings.json에 파일 중첩(File Nesting)을 켜 둡니다.
VS Code 탐색기에서 관련 파일을 대표 파일의 하위 파일로 보여주는 기능입니다.
12345678910111213{ "explorer.fileNesting.enabled": true, "explorer.fileNesting.patterns": { "tsconfig.json": "tsconfig.*.json, env.d.ts, typed-router.d.ts", "vite.config.*": "jsconfig*, vitest.config.*, cypress.config.*, playwright.config.*", "package.json": "package-lock.json, pnpm*, .yarnrc*, yarn*, .eslint*, eslint*, .oxlint*, oxlint*, .oxfmt*, .prettier*, prettier*, .editorconfig, bun.lock, nub.lock" }, "editor.codeActionsOnSave": { "source.fixAll": "explicit" }, "editor.formatOnSave": true, "editor.defaultFormatter": "esbenp.prettier-vscode" }
사용이 불편하다면, 해당 옵션을 false로 바꿔 끌 수 있습니다.
옵션을 제거하지 않고 false로 명시하면, 전역 설정과 관계없이 이 프로젝트에서는 파일 중첩 옵션을 항상 사용하지 않습니다.
123{ "explorer.fileNesting.enabled": false }
# SCSS 구성
Vite는 SCSS(Sass)를 기본으로 지원하기 때문에, 컴파일러 패키지만 설치하면 별도의 구성 없이 사용할 수 있습니다.
1npm i -D sass-embedded
컴파일러는 sass와 sass-embedded 두 가지 패키지로 제공됩니다.
Vite는 sass-embedded가 설치되어 있으면 sass-embedded를 사용하고, 없으면 sass를 사용합니다.
| 패키지 | 설명 |
|---|---|
sass |
Dart로 작성한 컴파일러를 자바스크립트로 변환한 패키지 |
sass-embedded |
네이티브 Dart 실행 파일을 사용하는 패키지, 대부분의 상황에서 더 빠르게 컴파일 |
설치가 완료되면, *.vue 파일의 <style> 요소에 lang="scss" 속성을 추가해서 사용할 수 있습니다.
1234567891011121314<template> <div class="card"> <h2 class="title">제목</h2> </div> </template> <style lang="scss" scoped> .card { padding: 20px; .title { color: #2f6fed; } } </style>
프로젝트 생성 시 만들어진 전역 스타일 파일도 확장자를 .scss로 변경할 수 있습니다.
확장자를 변경했다면, 진입 파일에서 가져오는 경로도 함께 수정합니다.
123456import { createApp } from 'vue' import './style.css' import './style.scss' import App from './App.vue' createApp(App).mount('#app')
변수(Variable)나 믹스인(Mixin)을 여러 컴포넌트에서 사용하려면, 각 파일에서 매번 @use로 가져와야 합니다.
Vite의 css.preprocessorOptions 옵션을 사용하면, 모든 SCSS 파일의 가장 위에 원하는 구문을 자동으로 추가할 수 있습니다.
먼저 변수와 믹스인을 작성할 파일을 만듭니다.
파일 이름을 밑줄(_)로 시작하면 단독으로 컴파일하지 않는 조각 파일(Partial)이 되고, 다른 파일에서 가져올 때만 사용됩니다.
12345678$color-primary: #2f6fed; $breakpoint-tablet: 768px; @mixin flex-center { display: flex; align-items: center; justify-content: center; }
그리고 Vite 구성에 additionalData 옵션을 추가합니다.
앞서 구성한 경로 별칭 @를 그대로 사용할 수 있습니다.
1234567891011121314151617181920import { defineConfig } from 'vite' import vue from '@vitejs/plugin-vue' // https://vite.dev/config/ export default defineConfig({ plugins: [vue()], resolve: { alias: [ { find: '@', replacement: '/src' }, { find: 'node_modules', replacement: '/node_modules' } ] }, css: { preprocessorOptions: { scss: { additionalData: '@use "@/assets/scss/variables" as *;' } } } })
가져올 파일의 이름에서 밑줄과 확장자는 생략할 수 있습니다.as *는 이름공간(Namespace) 없이 가져오는 구문으로, variables.$color-primary가 아닌 $color-primary로 사용할 수 있습니다.
이제 모든 컴포넌트에서 @use 없이 변수와 믹스인을 사용할 수 있습니다.
123456789101112131415<style lang="scss" scoped> .card { @include flex-center; padding: 20px; .title { color: $color-primary; } } @media (min-width: $breakpoint-tablet) { .card { padding: 40px; } } </style>
끝까지 읽어주셔서 감사합니다.
좋아요와 응원 댓글은 블로그 운영에 큰 힘이 됩니다!